
Raksha Bandhan is just a week away. Tired of shopping for same old Rakhi designs? Thinking of ways to make your own DIY Rakhi? Look no further! We have cherry-picked 4 best designs…4 best ideas to make DIY Rakhis at home. So, what are you waiting for? Mummas and Papas, gear up. Get creative and involve your children in simple steps to make their own Rakhis.
So, are we all set to make handmade, personalized Rakhis for our special ones? Check these designs and do tell us which one did you try making at home? Make this wonderful festival more personal, healthy and fun to celebrate with Slurrp Farm Rakhi Box (which includes 2 cookies, one pancake mix, one dosa mix, one puff, and one munchie)


1. Clay Rakhi with Keychain Provision
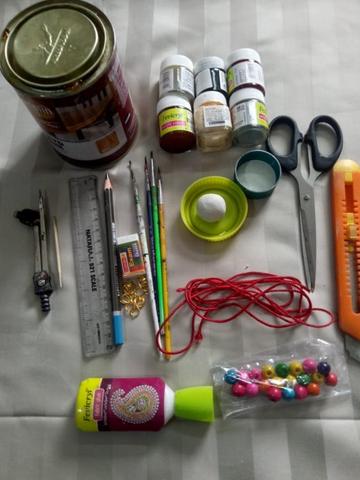
Material required:
1. Shilpkar Clay
2. Fabric colors
3. Color brushes
4. Colored thread
5. Stationery (Pen, pencil, eraser, scale, and cutter)
6. Toothpick
7. Key chainring
8. Decorative Beads
9. Talcum Powder
10. Varnish

Method:
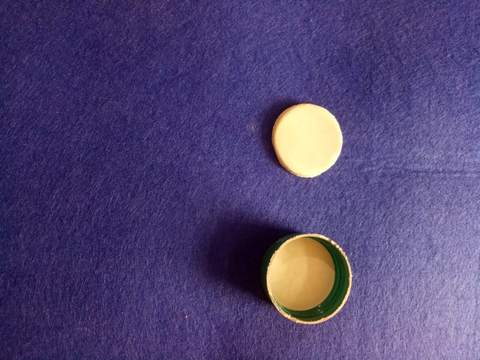
1. Cut a circular shape of the clay with a mold. Let it dry for 15 minutes

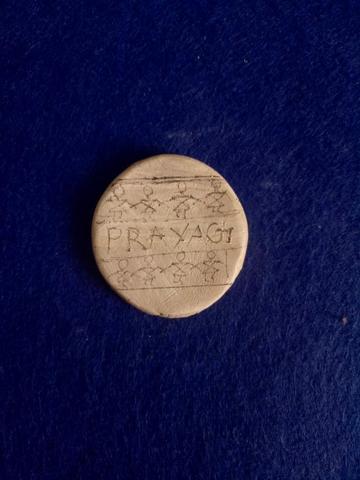
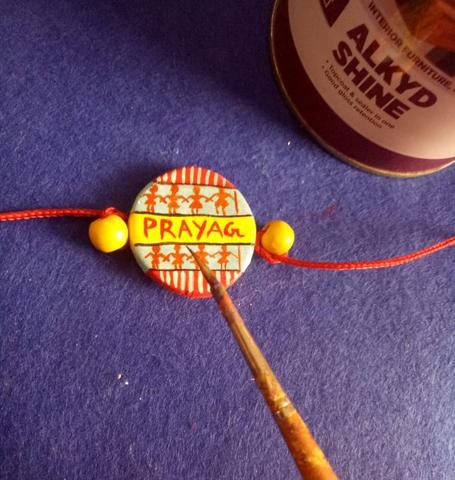
2. Once solid, draw the three departments as shown in the picture. Draw the worli design and write your brother’s name
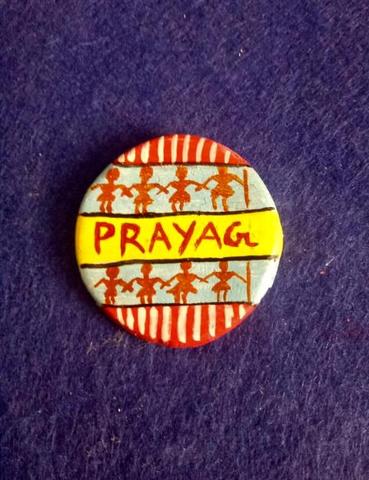
3. Apply the first color: White, and let it dry. Now, use different colors for three different compartments as shown in the picture. Let it dry. Don’t forget to color the sides as well

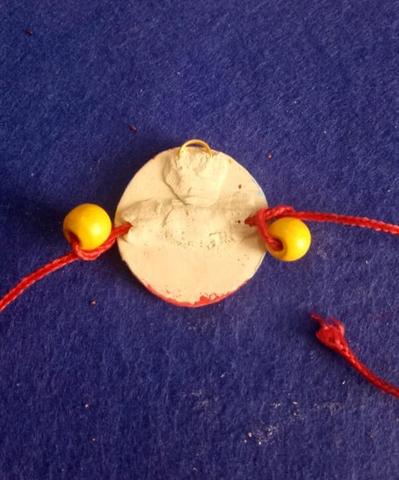
4. Put the clay upside down and place the thread in the center. Pass the beads through the thread as shown in the picture. Stick the small cylindrical clay on the thread to join it with the rakhi. Also, attach the key chain ring on the top with the help of a tiny ball of clay. Let it dry for 15 minutes till solid

5. Now color the back of the clay as the font. Apply a coat of varnish on the front to give it the final finished touch. It enhances the effect of the product. And let it dry for at least 3 hours

6. Your customized name DIY Rakhi is ready and can be used as a keychain later on
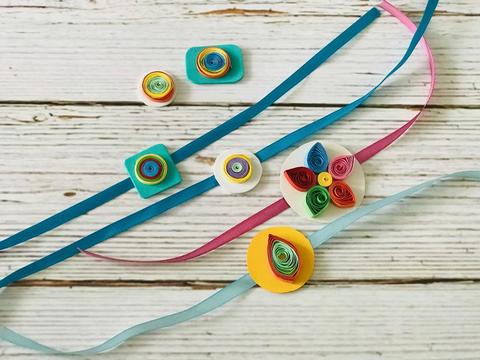
2. Quilling Rakhi
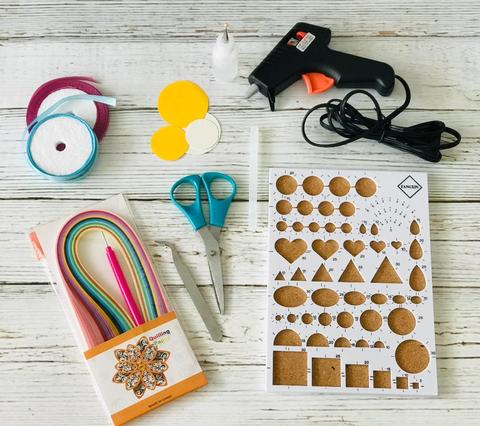
Material required:
1. 25 Cms long Colourful Paper quilling strips
2. Slotted curling tool or the curling needle
3. Quilling board (optional)
4. Tweezers (optional)
5. Small 1-1.5’’ paper rounds to form the base
6. Craft glue
7. Glue gun (optional if you have a sturdy crafts glue)
8. A neat and clean workboard

Method:
1. Choose a colored strip (the brighter the merrier is your Raksha Bandhan celebration) and use the curling needle to coil it up
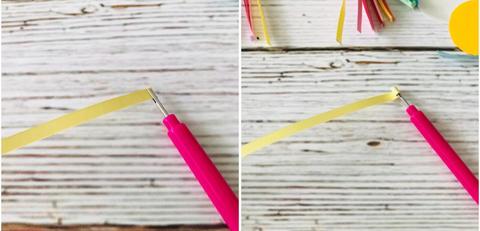

2. You may choose to let the coil wind up tightly or may wish to loosen it up a bit to show gaps. Do not forget to glue up the loose end after the shape has been confirmed
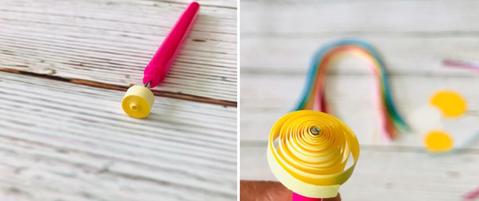

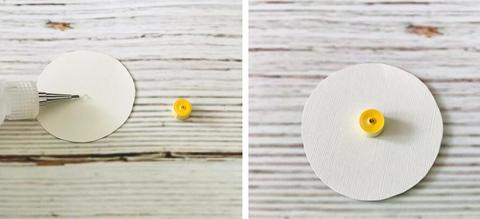
3. Glue this first coil to the paper round of your choice

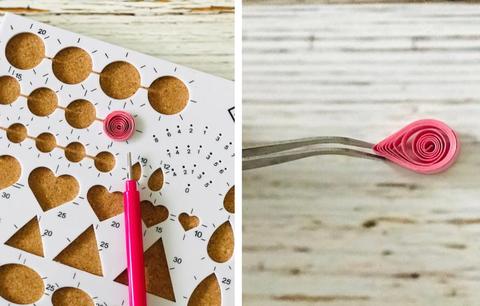
4. Repeat the 1st step and then let the curl loosen up in one of the round slots of the quilling board. Use tweezers to pinch one corner and glue up the loose end

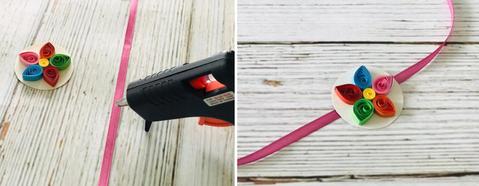
5. Repeat step 4 and make 4 more similar curls with different color strips and glue any of their loose ends. Use glue to paste all the 5 curls around the 1st curl glued to the paper round, to look like a flower


6. Use a glue gun to attach this to your Ribbon and your beautiful Rakhi is ready

7. Use the method above to experiment with different colored strips and different slots of the quilling board and come up with your own designs of beautiful homemade Rakhis!
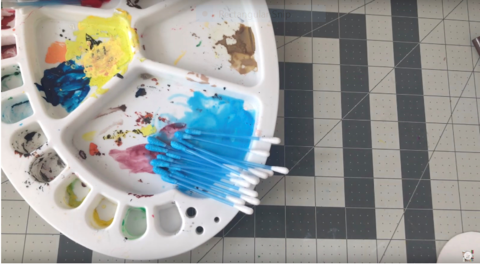
3. Cotton Swabs Rakhi
Material required:
1. Cotton swabs
2. Acrylic/ poster/ fabric colours
3. Cardboard
4. Ribbon
5. Stationery (Stapler, tape, scissors, glue)

Method:
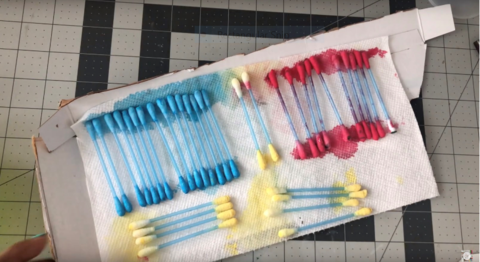
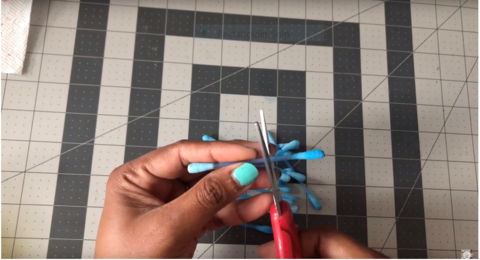
1. Color the cotton swabs with 3 different colors (red, yellow, blue or any color of your choice). Acrylic colors are used here, however, you can also use poster or fabric colors. Allow it to dry

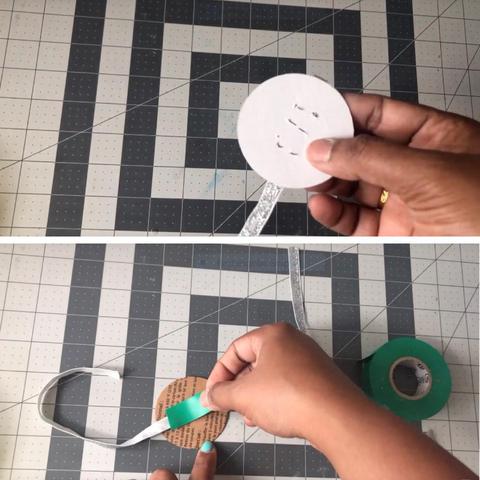
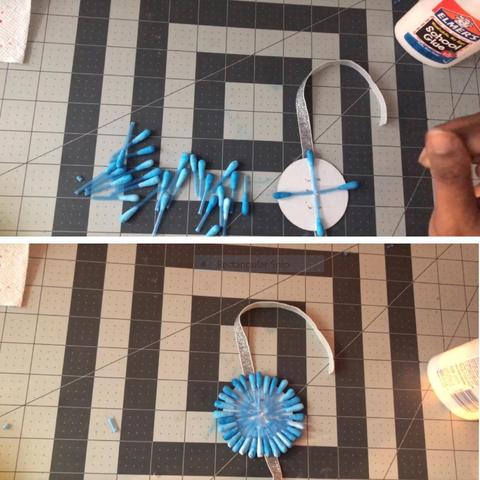
2. Cut out a circle from cardboard in the size of the Rakhi and staple a ribbon on it. The pin endings should be an upside. You may secure the pins with tape so that you don’t get hurt

3. Cut the different color cotton swabs in different sizes. The biggest size goes on the outside of the circumference and the smallest goes in the middle

4. Start gluing the swabs on the cardboard with the blue one (or the biggest size)

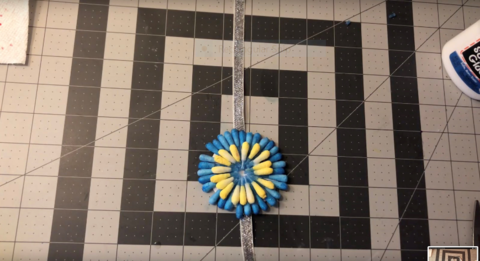
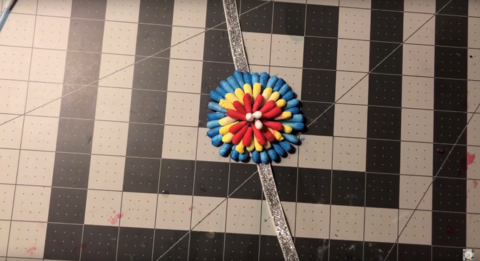
5. Then glue the yellow ones, followed by the next size and so on. Let it dry completely before using it

6. Your unique cotton swab DIY Rakhi is ready to be used

Here is how to use a cotton swab for crafting
Make 3 healthy, easy recipes on Raksha Bandhan. Learn how to make Ragi Ladoos and Barfis!
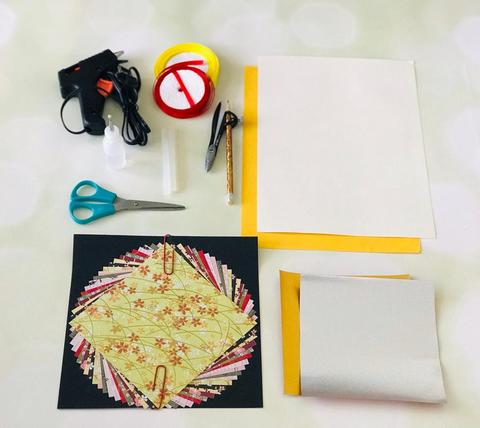
4. Paper Fan Rakhi
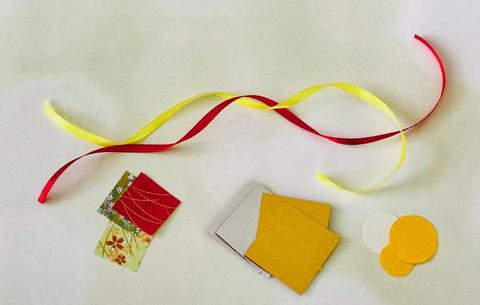
Material required:
1. Ribbons/yarn threads/strings-cut to 25 cms
2. Colorful origami paper (we used a mix of printed and plain silver/golden paper)
3. 200gsm paper sheets – cut paper rounds for the base
4. Compass
5. Scissors
6. Craft glue
7. Glue gun (optional if you have a sturdy crafts glue)
8. A neat and clean workboard

Method:
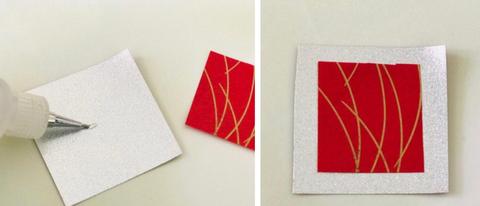
1. Cut different sized squares (1-1.5-inch side) out of origami papers. Also, cut small circles of approx the same diameter or less from the 200gsm craft papers

2. Attach the small pieces of squares on top of the bigger pieces

3. Turn these squares around and start folding them alternately on each side. You will end up with a zig-zag folded square
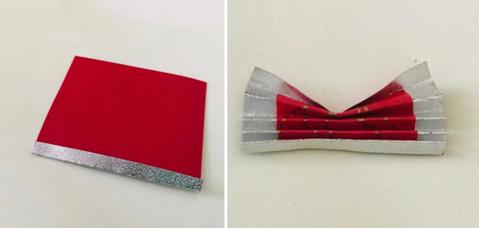

4. Attach 2 such zigzag squares together using glue and fold it in the middle. Bring the remaining sides together and join them with glue. You would now have it in the shape of a fan
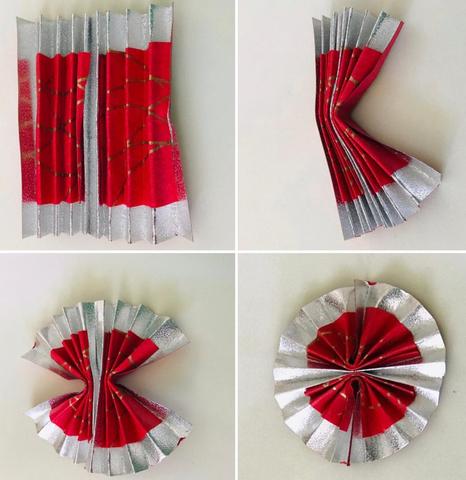

5. Glue this to one of the 200 gsm paper rounds and once dry use a glue gun to attach this to the ribbon
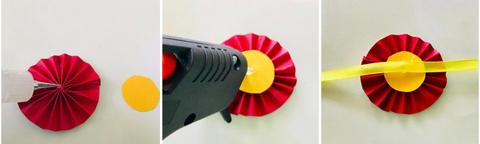

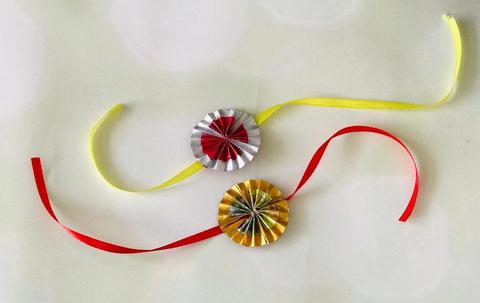
6. Your Rakhi is ready. Experiment with a few more colored papers and create some more cheerful ones
7. Your customized name DIY Rakhi is ready and can be used as a keychain later

Aren’t these fun kids’ activities?
Choose the one that you like the most and get started, now! Post your Rakhi picture on Instagram and tag/hashtag us @SlurrpFarm #SlurrpFarm