by Sharanya Munsi
Winter holidays call for fun Christmas crafts for kids to create at home. Be it drawing Santa faces or making paper Christmas trees, the options are innumerable with positive creative tickles to enjoy through the season. Here’s a collection of easy Christmas crafts for kids to try at home.
1. Santa face mask
Spruce up your list of Christmas crafts for kids with this innovative and functional Santa face mask.
Materials required:
1. One white or blue surgical face mask
2. One red cotton ball
3. One A4 silver foam sheet
4. One small white Santa beard
5. Pencil
6. Black marker
7. Scissors
9. Hot glue gun
Instructions:
1. Wear the face mask and using a marker put a dot on the mask where it touches the tip of your nose.
2. Measure the width of the mask and mark it on the backside of the foam sheet.
3. Draw a moustache between the marked points on the foam sheet and cut it. It should not be more than 2 cm in width.
4. Using a hot glue gun, stick the red cotton ball on the dot.
5. Stick the moustache cutting directly below, using the ball as the centre point of the moustache.
6. Stick the white beard directly below the moustache.
7. Your Santa face mask is ready to keep you safe during Christmas.
Instead of stepping out, you can admire the beauty of the splendid winter from the inside. Get cozy and grab a cup of hot chocolate and start baking from this yummy range.

2. Sock snowman
If you are looking for easy Christmas crafts that also helps you recycle old socks lying around the house, then this snowman is your saviour.

Materials required:
1. One old white sock
2. One old colorful sock
3. 3 cups of rice
3. 5-6 colourful buttons
4. One black pipe cleaner
5. One orange pipe cleaner
6. Red ribbon
7. Hot glue gun
8. Black marker
9. 2 jute string
Instructions:
1. Fill the white sock with rice and fasten the open end with the jute string.
2. Locate the center of the sock and tie the second jute string tightly to create the body and head.
3. Cut the colorful sock in half and fasten it over the head of the snowman. You can fold the ends to adjust it to sit properly on the head.
4. Cut a part of the ribbon and tie it to the end of the coloured sock to create a beanie.
5. Cut another strip of the colour sock and tie it around the neck of the snowman to give it a muffler.
6. Glue coloured buttons to the body.
7. Cut the black pipe cleaner to create eyes and stick it to the head.
8. Cut 1 cm long orange pipe cleaner and stick it to the head to make the carrot nose.
9. Use black marker to draw a smile on the face.
10. Your sock Snowman is ready.
|
Our recommended picks for Christmas and holiday season
|
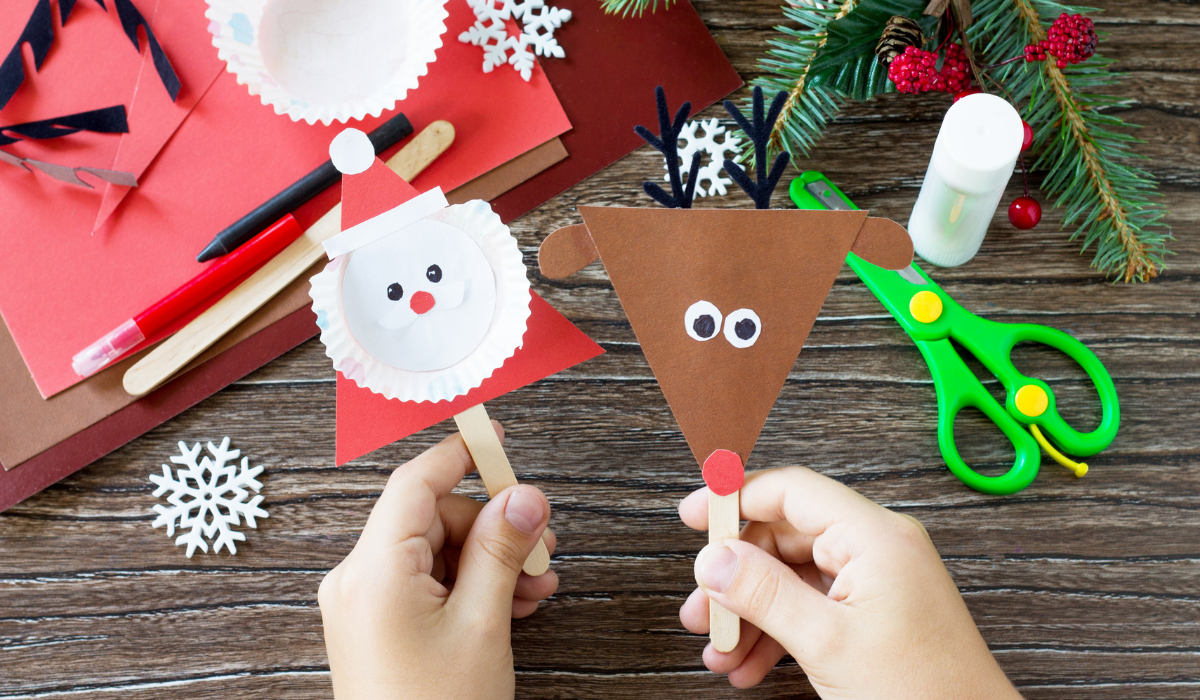
3. Rudolf headband
Christmas crafts for kids call for including all the fun elements of the merry occasion like Rudolf and his bright shiny nose to light up spirits.
Materials required:
1. One brown chart paper
2. One A4 red foam paper
3. One A4 black craft paper
4. One A4 white craft paper
5. One pair of stick-on velcro
6. Hot glue gun
7. Scissors
8. Glue
9. Colour pencils
Instructions:
1. Cut a thin strip of white paper and place it around the crown to measure the length of the headband.
2. Cut a brown paper of the white paper length measured in the previous step. It should be 4 cm in width. This will be the base of the headband.
3. Draw the shape of a reindeer head with horns on the brown paper.
4. Cut a red circle and two black circles for the reindeer’s nose and eyes respectively.
5. Stick them on a the shape of the head.
6. Use colour pencils to add more features to the reindeer’s face like whiskers, eyeballs and others.
7. When completed, attach the completed head to the headband base.
8. Attach the velcro pieces to either end of the headband with a glue gun.
9. Your Rudolf headband is complete.
4. 3D Paper Christmas tree
One of the easiest and fast Christmas crafts for kids to whip up at home is a green paper Christmas tree.

Materials required:
1. One A4 size green craft paper
2. One small silver star
3. One box of colourful rhinestones
4. 50 cm glittery ball chains
5. Scissor
6. Hot glue gun
7. Scale
8. Pencil
Instructions:
1. Draw three triangles of base 8 cm and 6 cm in height.
2. Cut them and fold them each in half along the centre.
3. Glue each arm of the triangle to another arm of the triangle keeping the pointed ends of each triangle on one side. On completion, your tree should be able to stand on its own.
4. Hot Glue the rhinestone to each external arm of the tree.
5. Drape the glittery ball chains in a criss-cross manner across the tree.
6. Glue the silver star on top and your paper Christmas tree is read.
5. Elf photo doll with crinkle arms
An easy Christmas craft for kids to see their face up on the Christmas tree is an Elf photo doll.
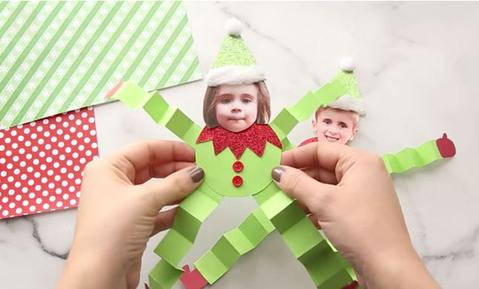
Pic credits: thebestideasforkids.com
Materials required:
1. One A4 green craft paper
2. One A4 red craft paper
3. One A4 black craft paper
4. One A4 white craft paper
5. One A4 yellow craft paper
6. One old passport size photo
7. Punching machine
8. Scissors
9. Glue
10. Scale
11. Pencil
Instructions:
1. Cut 4 strips of green paper that are 10X2 cm in measurement.
2. Crease the strips at every 2 cm to create the crinkle effect. These will be the arms and legs of the elf.
3. Draw and cut out an ellipse that is 5 cm in diameter on the green paper. This will form the body of the elf.
4. Cut out a white ellipse that is 3 cm in diameter to form the head. Leave a shaft that is 1 cm long to form the neck.
5. Cut out four smaller ellipses of 2 cm in diameter on the black paper. These will form the feet and palm of the elf.
6. Cut 4 thin strips of paper of 2×1 cm to add a layer to the arms and feet.
7. Stick the yellow cut out to each arm and leg near the end to make your doll more attractive
8. You can also cut out a collar from the yellow paper to make your doll fancier.
9. Draw and cut a tiny black hat to fit the head.
10. Stick the black feet and palms to one end of the long green strips each.
11. Punch out 3-4 holes in the black paper and stick them on the body to create buttons for the elf’s coat.
12. Attach the crinkle arms and legs to the body and you will see your paper Christmas elf coming alive.
13. Trace the white ellipse for the head to the back of the photograph, cut your photograph to fit the circle and stick it to the white ellipse.
14. Attach the head to the body with glue.
15. Add the hat to the head and your Elf photo doll is ready to adorn your Christmas tree.